Making fun with Spring ImageBanner

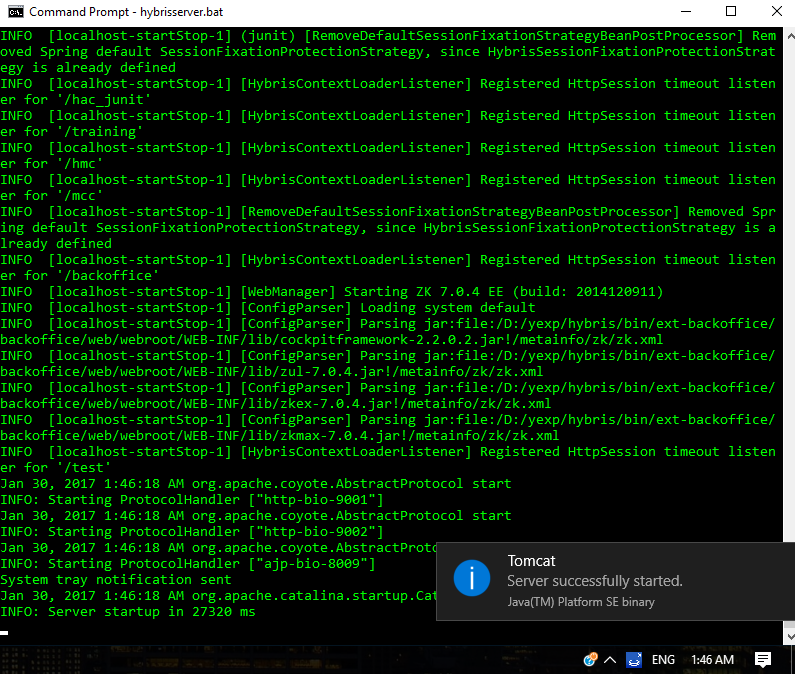
I believe that  most you have seen Spring ASCII logo in your console window on the Spring Boot application start up. Just in case here is an example:

spring-boot-acii

But the interesting thing is that you can create such ASCII graphics easily by your own.

In Spring Boot 1.4 a new class called ImageBanner was introduced. You can play with this class in any project that has spring-boot version 1.4 or greater. So to make some fun I created a simple spring boot application using Spring Initializr and the basic usage of ImageBanner is following:

package com.wordpress.nikitapavlenko;

import org.springframework.beans.factory.annotation.Autowired;
import org.springframework.boot.CommandLineRunner;
import org.springframework.boot.ImageBanner;
import org.springframework.boot.SpringApplication;
import org.springframework.boot.autoconfigure.SpringBootApplication;
import org.springframework.core.env.Environment;
import org.springframework.core.io.ClassPathResource;
import org.springframework.core.io.Resource;

@SpringBootApplication
public class ImagebannerSpringApplication implements CommandLineRunner {

	@Autowired
	private Environment environment;

	public static void main(String[] args) {
		SpringApplication.run(ImagebannerSpringApplication.class, args);
	}

	@Override
	public void run(String... strings) throws Exception {
		Resource imageResource = new ClassPathResource("9gag.png");
		ImageBanner imageBanner = new ImageBanner(imageResource);
		imageBanner.printBanner(environment, getClass(), System.out);
	}
}

Just to clarify I need to mention that Spring boot initilizr creates usual mvn project with src/main/java, src/main/resources folders. The image “9gag.png” was placed to src/main/resources folder and it looks following:

9gag.png

The result of program execution printed that cool ASCII graphics in the console log:

9gag-logo-acii

It looks awesome, does not it? You can checkout the code from my github imagebanner-spring-demo or you can try to play with ImageBanner directly in browser imagebanner-demo.herokuapp.com. I created and deployed to heroku small app that can do conversion to ASCII for you.

Thanks for your attention!

Reinventing java properties or using “Owner” library

Most of java developers use property files in their daily work. Basically we need them to configure our applications, to make our code more flexible and reusable. Unfortunately Java API for properties is very far away from perfect also most of developers are used to writing lots of the repetitive and routine code when accessing properties.

What do I mean? Let’s consider the following example:

foo.properties

db.timeout=10

Bar.java

// static fields
private static final String TIMEOUT_KEY = "db.timeout";
private static final int DEFAULT_TIMEOUT = 10;
..
// within some method
String timeOutString = properties.getProperty(TIMEOUT_KEY);
Integer timeOut;
try {
    if(timeOutString != null &&  !timeOutString.isEmpty()) {
        timeOut = Integer.parseInt(timeOutString);
    } else {
        timeOut = DEFAULT_TIMEOUT;
    }
} catch (NumberFormatException e){
    timeOut = DEFAULT_TIMEOUT;
}
// using timeout

So in the example above we can see classical issues with accessing properties.

Issue #1 – Duplication of converting logic

try {
    timeOut = Integer.parseInt(timeOutString);
} catch (NumberFormatException e){
    timeOut = DEFAULT_TIMEOUT;
}

This try-catch is going to be placed in every place where you want to convert String to Integer, which leads to duplication. So if Integer property was changed to Long you would have to change it in all places where you use it.

Issue #2 – Duplication of fallback to default value

if(timeOutString != null && !timeOutString.isEmpty()) {
    timeOut = Integer.parseInt(timeOutString);
} else {
    timeOut = DEFAULT_TIMEOUT;
}

Unfortunately, I’ve seen many times a piece of code like one written above. Sometimes property value is being checked just for null, sometimes for emptiness, sometimes fallback value is used after unsuccessful conversion. In all cases same mechanism:

no effective value – use default

Issue #3 – Duplication of constants

private static final String TIMEOUT_KEY = "db.timeout";
private static final int DEFAULT_TIMEOUT = 10;

I guess most of you have ever seen such constants. Unfortunately, I faced many situation when constants were not extracted to a separate class and just were copy-pasted. So when we have service-A which uses property1,property2 and service-B which uses property1, property2 we would have 16 string constants.

  • 4 constants in service-A impl (prop1_key, prop1_default, prop2_key,prop2_default)
  • 4 constants in service-A test (prop1_key, prop1_default, prop2_key,prop2_default)
  • same for service-B impl
  • same for service-B test

Can you imagine how ineffective it is?

At this moment you may think that I’ve never heard about properties support in the spring framework or in Apache framework , but it is not true. I am aware of them and I am using them, but still they don’t solve issues mentioned above.  @Value annotation allows you to inject property value on context-startup and there is no ease way to reload injected properties ( I am aware only about spring-cloud). Apache framework provides lots of methods for conversion and mechanism of fallback to default, but still we need to duplicate constants which sometimes looks stupid, especially if you copy-them in your Junit test.

Here is  the moment when Owner framework enters the game. Basically it makes properties handling as ease as possible. This is how example above looks like using Owner:

    import org.aeonbits.owner.Config;
    public interface AppConfig extends Config {
        @DefaultValue("10")
        @Key("db.timeout")
        int dbTimeout();
    }
// somewhere in a method
ServerConfig cfg = ConfigFactory.create(ServerConfig.class);
int timeout = cfg.dbTimeout();
//using timeout

Is not that cool? The general idea is that we are accepting convention over configuration which allows us to write as less code as possible. Also annotations in the library lead us to more declarative style rather than imperative.

Instead of describing Owner documentation , which is good enough, I would prefer to look at some example.

First of all we need to create maven project, I created one using
mvn archetype:generate + maven-archetype-quickstart

Then we need to add owner library via dependency

    <dependencies>
        <dependency>
            <groupId>org.aeonbits.owner</groupId>
            <artifactId>owner-java8</artifactId>
            <version>1.0.6</version>
        </dependency>
    </dependencies>

Then I created 2 properties file. One is called resources/db.properties and the second one is resources/config/server.properties. I put the following content there:

// db.properties
db.url=jdbc:mysql://db.domain.com/mysql
dbTimeout=10:SECONDS

//server properties
server.usernames=thor,loki
server.blog.url=https://nikitapavlenko.wordpress.com/

Then we can create config class. I created interface called AppConfig.

@LoadPolicy(Config.LoadType.MERGE)
@Sources({"classpath:db.properties", "classpath:config/server.properties"})
interface AppConfig extends Config {

    @DefaultValue("10")
    int maxThreads();

    @Key("db.url")
    String databaseConnectionUrl();

    @ConverterClass(TimeoutConverter.class)
    TimeOut dbTimeout();

    @Separator(",")
    @Key("server.usernames")
    List<String> serverUsernames();

    @Key("server.blog.url")
    URL serverBlogUrl();

}

Without @Sources annotation owner tries to find ${configclassname}.properties file in a classpath. Since I named files in another I can say owner need to load my properties files via @Sources annotation:

@LoadPolicy(Config.LoadType.MERGE)
@Sources({"classpath:db.properties", "classpath:config/server.properties"})

In source you can use classpath resources as well as just file resources (e.g. “file:/home/foo.properties”)

Lets go through define methods one by one:

  • maxThreads – no property with such name is defined, default value from annotation should be used
  • databaseConnectionUrl – no property with such name, but there is @Key annotation which will be used to get correct value
  • dbTimeout – is existing property, but class timeout was defined by me, so custom Converter which I defined in @ConverterClass(TimeoutConverter.class) should be used
    
    public class TimeOut {
        private int amount;
        private TimeUnit timeUnit;
    
        public TimeOut(int amount, TimeUnit timeUnit
        ) {
            this.amount = amount;
            this.timeUnit = timeUnit;
        }
    
        public int getAmount() {
            return amount;
        }
    
        public TimeUnit getTimeUnit() {
            return timeUnit;
        }
    }
    
    public class TimeoutConverter implements Converter {
    
        @Override
        public Object convert(Method method, String s) {
            String[] values = s.split(":");
            int amount = Integer.parseInt(values[0]);
            TimeUnit timeUnit = TimeUnit.valueOf(values[1]);
            return new TimeOut(amount, timeUnit);
        }
    }
    
    
  • serverUsernames – such property does not exist, but again there is @Key annotation and @Separator, which means that values will be splitted using separator
  • serverBlogUrl – example of rich Convertion support, converting java.net.URL

Then I created a class ConfigDemo to show how to access defined properties.

public class ConfigDemo {

    private static void print(String value){
        System.out.println(value);
    }

    public static void main(String[] args) {
        AppConfig configApp = ConfigFactory.create(AppConfig.class);
        print("Max threads:" + configApp.maxThreads());
        print("DB URL: " + configApp.databaseConnectionUrl());
        print("Timeout " + configApp.dbTimeout().getAmount() + " " + configApp.dbTimeout().getTimeUnit());
        print("Usernames: " + configApp.serverUsernames());
        print("URL: " + configApp.serverBlogUrl());
    }

}

Here is the output of the program.

Max threads:10
DB URL: jdbc:mysql://db.domain.com/mysql
Timeout 10 SECONDS
Usernames: [thor, loki]
URL: https://nikitapavlenko.wordpress.com/

You can find this example on my github: owner-properties-demo.

As you see, it works pretty well. Now you can go much faster with your app configuration since there is no need to write dozens of lines to access , fallback or convert properties. All of that is already there.

Summary

If you are tired of writing routine and repetitive code for handling properties then owner it is something you should definitely try to use. You can be sure that is it stable, at least they use TDD and claim 97% code coverage. Also they are feature rich, which means that you will definitely find what you need.  In regards to me: if I need properties management in my next pet or production project  I will definitely use owner library.

Spring tips: How to merge collections in spring xml?

Hello guys, today we are going to discover how to merge collections in spring.xml. So lets imagine the situation that you are developing 2 a bit different websites “potatoSite” and “tomatoSite” using spring. And you created a a service that clean ups data.

interface CleanUpService {
    void cleanUp();
    void setDirsToCleanUp(Set<String> dirs);
}

You made your service configurable so you can set up list of directories to clean up. So the initial setup was following:

<bean id="cleanUpService" class="x.y.z.CleanUpServiceImpl">
	<property name="dirsToCleanUp">
		<set>
			<value>media</value>
			<value>logs</value>
		</set>
	</property>
</bean>

But then a new requirement appeared and now for different sites you have to use 2 different set of directories. Since you already had profiles for different sites you decided to put beans under profile:

<beans profile="tomatoSite">
    <bean id="cleanUpService" class="x.y.z.CleanUpServiceImpl">
        <property name="dirsToCleanUp">
            <set>
                <value>media</value>
                <value>logs</value>
                <value>archived</value>
            </set>
        </property>
    </bean>
</beans>

<beans profile="potatoSite">
    <bean id="cleanUpService" class="x.y.z.CleanUpServiceImpl">
        <property name="dirsToCleanUp">
            <set>
                <value>media</value>
                <value>logs</value>
                <value>cache</value>
            </set>
        </property>
    </bean>
</beans>

It looks good, does not it? Everything what is required implemented. It seems that we can stop. But no, we have a duplication of configs. So we have a choice:

  • to create a parent bean for service with common set of dirs and extend it in child beans under spring profile
  • to create a parent bean for sets and extend it in child beans.

Lets consider both options. The first is option with service as a parent bean and extending dirToCleanUp property in child beans:

<bean id="baseCleanUpService" class="x.y.z.CleanUpServiceImpl" abstract="true">
    <property name="dirsToCleanUp">
        <set>
            <value>media</value>
            <value>logs</value>
        </set>
    </property>
</bean>

<beans profile="tomatoSite">
    <bean id="cleanUpService" parent="baseCleanUpService">
        <property name="dirsToCleanUp">
            <set merge="true">
                <value>archived</value>
            </set>
        </property>
    </bean>
</beans>

<beans profile="potatoSite">
    <bean id="cleanUpService" parent="baseCleanUpService">
        <property name="dirsToCleanUp">
            <set merge="true"> 
                <value>cache</value> 
             </set> 
        </property> 
    </bean> 
</beans> 

Merge attribute is presented for list, map, set or props elements. It covers the most cases you have in spring application.

The way I showed above is more classical way, sometimes you can’t follow it e.g. you don’t have spring profiles, but you need to implement such feature. What you going to do? I assume solution can be the following:

<bean id="cleanUpService" class="x.y.z.CleanUpServiceImpl">
    <property name="dirsToCleanUp" ref="${site.id}-dirs"/>
</bean>

<bean id="commonDirs" class="org.springframework.beans.factory.config.SetFactoryBean">
    <property name="sourceSet">
        <set>
            <value>media</value>
            <value>logs</value>
        </set>
    </property>
</bean>

<bean id="popato-dirs" parent="commonDirs">
    <property name="sourceSet">
        <set merge="true">
            <value>cache</value>
        </set>
    </property>
</bean>

<bean id="tomato-dirs" parent="commonDirs">
    <property name="sourceSet">
        <set merge="true">
            <value>archived</value>
        </set>
    </property>
</bean>

The snippet above has 2 interesting things:

  • You can use FactoryBean to inherit set property. Know child classes of Factory bean are: ListFactoryBean, MapFactoryBean, SetFactoryBean, SortedResourcesFactoryBean etc.
  • You can use values from property file to define bean name. In example above ${site.id}-dirs will be evaluated dynamically based on included source of .properties file and if you have site.id=tomato that tomato-dirs bean will be used.

Basically that is it for today. I understand that situation may look like unreal and I guess most of developer would just extract list of directories into property file, but now you know that such feature in spring exist and you can use it. Thanks.

How to use Javaslang Pattern Matching?

Most of Java developers who work with Java 8 are aware of awesome features such as lambdas, method references and Stream API. Those features help us everyday to write o reduce the amount of code and to increase the robustness. Unfortunately one more feature that Java is still missing is pattern matching. Inspired by Scala language Javaslang library brings pattern matching into Java language. Basically Javaslang is a standalone library written in pure java which helps to write functional code in Java 8. You can read more info  about it on their official website.

In this particular article we are going to cover next topics:

  1. How to add Javaslang to your project
  2. How to use basic pattern matching API
  3. How to use Javaslang annotation preprocessor to use object decomposition in pattern matching

How to add Javaslang to your project

Javaslang has one major prerequisite. You project should have Java 1.8 as a target version for compiler. Javaslang is available as an artifact in the maven central repository. Actually Javaslang has several modules :

  • javaslang-gwt GWT module for Javaslang.
  • javaslang-core  Javaslang control statements, immutable collections etc.
  • javaslang-match Adds compile time support for Javaslang’s structural pattern matching feature.
  • javaslang-test A property check framework for random testing of program properties.
  • javaslang-jackson Jackson datatype module, the standard JSON library for Java.
  • javaslang-render  A rendering library, currently housing tree renderers (ascii and graphviz).

We need to include Javaslang-core dependency which has a dependency on javaslang-match module. I am using maven to my pom.xml is following

<project xmlns="http://maven.apache.org/POM/4.0.0" xmlns:xsi="http://www.w3.org/2001/XMLSchema-instance"          xsi:schemaLocation="http://maven.apache.org/POM/4.0.0 http://maven.apache.org/xsd/maven-4.0.0.xsd">
    <modelVersion>4.0.0</modelVersion>
    <groupId>com.wordpress.nikitapavlenko</groupId>
    <artifactId>javaslang-demo</artifactId>
    <version>1.0-SNAPSHOT</version>
    <name>javaslang-demo</name>
    <packaging>jar</packaging>

    <properties>
        <project.build.sourceEncoding>UTF-8</project.build.sourceEncoding>
        <maven.compiler.source>1.8</maven.compiler.source>
        <maven.compiler.target>1.8</maven.compiler.target>
    </properties>

    <dependencies>
        <dependency>
            <groupId>io.javaslang</groupId>
            <artifactId>javaslang</artifactId>
            <version>2.1.0-alpha</version>
        </dependency>
    </dependencies>

</project>

How to use basic pattern matching API

Lets have a look at very basic and simple example.

import static javaslang.API.*;
...
int i = 1;
String s = Match(i).of(
    Case($(1), "one"),
    Case($(2), "two"),
    Case($(), "?")
);

First of all match is implemented like an expression which means that result of match  can be assigned to a variable. Example above does not need an explanation about what it does, but rather how it works.

So class javaslang.API has static method Match, it creates an instance of Match class. Match has only 2 methods:

...
public final  R of(Case... cases)
public final  Option option(Case... cases)
..

So the depending on what you expect to get you can use method “of” and when no cases match you get MatchError or if you expect no result you can use method “option” and empty option is returned when nothing matches.

Both method accept vararg of Case objects. To create Case object javaslang has static factory methods in javaslang.API. Case method is overloaded and the main idea is that case should contain 2 parts:

  • part that can do matching logic. It can be instance of Predicate or Pattern.
  • part that says what should be returned when value matches. It can be any object or a supplier that will generate object. In example above plain object is used.

In our example we are sending $(1) as matching object, and “one” as returned value. Javaslang has some predefined methods to simplify pattern matching:

  • $() matches everything
  • $(value) incoming value should be equal to given one
  • $(predicate) to match predicate.test(incomingObject) should return true

$() and $(value) are presented in the example above, so lets focus on $(predicate).

import static javaslang.API.*;
...
Predicate<Integer> isEven = i -> i % 2 == 0;
Predicate<Integer> isOdd = isEven.negate();

int i = 1;
String s = Match(i).of(
        Case($(isOdd), "odd"),
        Case($(isEven), String::valueOf)
);

So in the example above you see that when predicate isOdd returns true we return “odd” string, when isEven returns true we are generating string value from number.

How to use Javaslang annotation preprocessor to use object decomposition in pattern matching

Matching object by equals or by pattern is already an awesome feature. But there are many situations when we need to do some matching based on object hierarchies.

So lets imagine that we are developing application in e-commerce domain where we have Order and PaymentTransaction. More details in code sample:

public class Order {

    private String code;
    private OrderStatus status;
    private PaymentTransaction paymentTransaction;
    private BigDecimal total;

   //getters, setters
}

public enum OrderStatus {
    PLACED,
    IN_PROGRESS,
    COMPLETED,
    CANCELLED
}

public class PaymentTransaction {
    private final BigDecimal value;
    private final PaymentType paymentType;
   //getters, setters
}

public enum PaymentType {
    CREDIT_CARD,
    CASH,
    GIFT_CARD,
    PAYPAL,
    RETURN
}

Then lets say you were asked to implement following feature:


Return payment status to customer depending of order state:

  • when order has no payment set – return ‘Not paid yet’
  • when order’s status is Cancelled and payment transaction type is RETURN – then return “Payment cancelled”
  • when order’ status is Completed and payment transaction type is CREDIT_CARD, PAYPAL or GIFT_CARD and payment transaction value equals order’s total – then return “Paid online with ${PaymentType}”
  • when order’ status is Completed and payment transaction type is CASH and payment transaction value equals order’s total – then return “Paid offline with CASH”
  • in all other cases – return empty string


We have following test for this:

So lets try to implement this feature using Java 8:

public String getPaymentStatus_javaVersion(Order order) {
        if (order.getPaymentTransaction() == null) {
            return "Not paid yet";
        }
        if (order.getStatus() == OrderStatus.CANCELLED && order.getPaymentTransaction().getPaymentType() == PaymentType.RETURN) {
            return "Payment cancelled";
        }
        if (order.getStatus() == OrderStatus.COMPLETED) {
            List<PaymentType> onlineTypes = Arrays.asList(PaymentType.CREDIT_CARD, PaymentType.PAYPAL, PaymentType.GIFT_CARD);
            if (order.getTotal().compareTo(order.getPaymentTransaction().getValue()) == 0) {
                PaymentType paymentType = order.getPaymentTransaction().getPaymentType();
                if (onlineTypes.contains(paymentType)) {
                    return "Paid online with " + paymentType;
                } else if (paymentType == PaymentType.CASH) {
                    return "Paid offline with CASH";
                }
            }
        }
        return "";
    }

Java version has nested blocks and it seems like something can be simplified. The way of accessing and checking fields can be done in a more declarative way by decomposing object using pattern match.

To use this feature in Javaslang you need to follow several steps:

  1. Define class marked with @Patterns annotation
  2. Implement method to convert your object to TupleN and mark with @Unapply annotation
  3. Compile your project to activate javaslang annotation processor
  4. Use generated sources in Match-Case expression

Source code:

@Patterns
public class Order {

    // fields and getters/setters

    @Unapply
    static Tuple3<String, OrderStatus, PaymentTransaction> Order(Order order) {
        return Tuple.of(order.code, order.status, order.paymentTransaction);
    }
}

@Patterns
public class PaymentTransaction {
    // fields and getters/setters
   @Unapply
    static Tuple2<BigDecimal, PaymentType> PaymentTransaction(PaymentTransaction paymentTransaction) {
        return Tuple.of(paymentTransaction.value, paymentTransaction.paymentType);
    }

}

After building our maven project, on compilation phase javaslang.match.PatternsProcessor generates new java classes. A generated Java class has following name ${InitialName}Patterns. So we have 2 new classes OrderPatterns and PaymentTransactionPatterns.


public final class OrderPatterns {

    private OrderPatterns() {
    }

    public static <_1 extends String, _2 extends OrderStatus, _3 extends PaymentTransaction> Pattern3<Order, _1, _2, _3> Order(Pattern<_1, ?> p1, Pattern<_2, ?> p2, Pattern<_3, ?> p3) {
        return Pattern3.of(Order.class, p1, p2, p3, com.mykytapavlenko.blog.Order::Order);
    }

}

public final class PaymentTransactionPatterns {

    private PaymentTransactionPatterns() {
    }

    public static <_1 extends BigDecimal, _2 extends PaymentType> Pattern2<PaymentTransaction, _1, _2> PaymentTransaction(Pattern<_1, ?> p1, Pattern<_2, ?> p2) {
        return Pattern2.of(PaymentTransaction.class, p1, p2, com.mykytapavlenko.blog.PaymentTransaction::PaymentTransaction);
    }

}

So now we can use Object decomposition in our business logic.

    public String getPaymentStatus_javaslangVersion(Order order) {
        return Match(order).option(
            Case(Order($(), $(OrderStatus.COMPLETED), PaymentTransaction($(eqTotal(order)), $(isIn(PaymentType.CREDIT_CARD, PaymentType.PAYPAL, PaymentType.GIFT_CARD)))),
                    (o, s, t) -> "Paid online with " + t.getPaymentType()),
            Case(Order($(), $(OrderStatus.COMPLETED), PaymentTransaction($(eqTotal(order)), $(isIn(PaymentType.CASH)))), "Paid offline with CASH"),
            Case(Order($(), $(OrderStatus.CANCELLED), PaymentTransaction($(), $(PaymentType.RETURN))), "Payment cancelled"),
            Case(Order($(), $(), $(isNull())), "Not paid yet")).getOrElse("");
    }

    private static Predicate<BigDecimal> eqTotal(Order order) {
        return (paidValue) -> paidValue.compareTo(order.getTotal()) == 0;
    }

In Javaslang version 2.1.0-alpha object decomposition is done in quite straightforward way. When we define Unapply method we describe a way of transforming our domain object to a tuple of n elements.

    @Unapply
    static Tuple3<String, OrderStatus, PaymentTransaction> Order(Order order) {
        return Tuple.of(order.code, order.status, order.paymentTransaction);
    }

Javaslang match library using this unapply creates decomposition method with the same name as our unapply method.

static <_1 extends String, _2 extends OrderStatus, _3 extends PaymentTransaction> Pattern3<Order, _1, _2, _3> Order(Pattern<_1, ?> p1, Pattern<_2, ?> p2, Pattern<_3, ?> p3) {
        return Pattern3.of(Order.class, p1, p2, p3, Order::Order);
    }

The decomposition method accepts as parameters patterns for each element of tuple. It means that for order we can define matching pattern for code, order status and payment transaction. This decomposition method merges 3 different patterns for each field into a single Pattern3 which then is passed to Case method for further checking.

Summary

I hope this article helped you to understand how pattern matching in javaslang works and how it can help in writing more clear, functional and declarative code using Java 8. I believe that javaslang will live long and that next releases will bring java developers more such features.

All source code you can find on my github javaslang-pattern-matching-demo . Thanks for reading!
Receive notification in the system tray on server startup (Tomcat, Hybris)

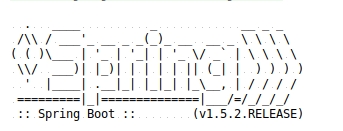
On many large e-commerce projects server startup can take up to 6-10 minutes. Hybris projects I worked at are not exception. So usually when I start the tomcat server I can do lots of other things. e.g. reading the spec, browsing the net or even continue development in my IDE. So after 5-6 minutes I can forget about the fact that my server is starting up. So I thought that it would be great to have a tool that can notify me as soon as tomcat starts up and I decided to develop  it. So basically what the tool has to do is to understand when tomcat server finishes startup and call OS utility to notify me about it.

OOTB hybris uses  Growl to notify developer about init/update actions. To activate it you need to install Growl for windows or Grow for OS X and add it your PATH.

Unfortunately Hybris does not support “server is ready” notification. But there is very simply way to do that. First of all tomcat has The LifeCycle Listener Component that can let us know about different events in tomcat server.

public interface Lifecycle {
	String BEFORE_INIT_EVENT = "before_init";
	String AFTER_INIT_EVENT = "after_init";
	String START_EVENT = "start";
	String BEFORE_START_EVENT = "before_start";
	String AFTER_START_EVENT = "after_start";
	String STOP_EVENT = "stop";
	String BEFORE_STOP_EVENT = "before_stop";
	String AFTER_STOP_EVENT = "after_stop";
	String AFTER_DESTROY_EVENT = "after_destroy";
	String BEFORE_DESTROY_EVENT = "before_destroy";
	String PERIODIC_EVENT = "periodic";
	String CONFIGURE_START_EVENT = "configure_start";
	String CONFIGURE_STOP_EVENT = "configure_stop";
}

From the list above AFTER_START_EVENT is the most appropriate event we can listen to. OK, it clear about event, but how should we put notification in the system tray? Basically there are two options:

  1. Use Growl via command line tool as Hybris does
  2. Use Java’s SystemTray class

As a good developer I think we should support both versions. So when Growl exists – use it, if does not exist – use default system tray. Lets write our implementation.

Step 1 – Create a project that can be packed as jar

As maven is still the most popular build tool lets create project from maven archetype.

mvn archetype:generate -DgroupId=com.wordpress.nikitapavlenko
-DartifactId=tomcat-notification
-DarchetypeArtifactId=maven-archetype-quickstart
-DinteractiveMode=false

My maven pom.xml is following:

<project xmlns="http://maven.apache.org/POM/4.0.0" xmlns:xsi="http://www.w3.org/2001/XMLSchema-instance"          xsi:schemaLocation="http://maven.apache.org/POM/4.0.0 http://maven.apache.org/maven-v4_0_0.xsd">
    <modelVersion>4.0.0</modelVersion>
    <groupId>com.wordpress.nikitapavlenko</groupId>
    <artifactId>tomcat-notification</artifactId>
    <packaging>jar</packaging>
    <version>1.0-SNAPSHOT</version>
    <name>tomcat-notification</name>
    <url>http://maven.apache.org</url>
    <properties>
        <maven.compiler.source>1.8</maven.compiler.source>
        <maven.compiler.target>1.8</maven.compiler.target>
    </properties>
    <dependencies>
        <dependency>
            <groupId>org.apache.tomcat</groupId>
            <artifactId>tomcat-catalina</artifactId>
            <version>7.0.12</version>
        </dependency>
    </dependencies>
</project>

Step 2 – Implement org.apache.catalina.LifecycleListener

package com.wordpress.nikitapavlenko;

import org.apache.catalina.Lifecycle;
import org.apache.catalina.LifecycleEvent;
import org.apache.catalina.LifecycleListener;

import java.awt.*;
import java.awt.TrayIcon.MessageType;
import java.io.IOException;
import java.net.URL;
import java.util.Calendar;
import java.util.Map;

public class TomcatListener implements LifecycleListener {

    @Override
    public void lifecycleEvent(LifecycleEvent event) {
        if (Lifecycle.AFTER_START_EVENT.equals(event.getType())) {
            if (growlExist()) {
                notifyViaGrowl();
            }
            else {
                notifyViaDefaultSystemTray();
            }
        }
    }

    private void notifyViaGrowl() {
        try {
            String message = "\"Server successfully started. [" + Calendar.getInstance().getTime()+"]\"";
            Runtime.getRuntime().exec("growlnotify /t:Tomcat " + message);
            System.out.println("Growl notification sent");
        } catch (IOException e) {
            e.printStackTrace();
        }
    }

    private boolean growlExist() {
        Map<String, String> env = System.getenv();
        String path = env.get("Path");
        return path != null && path.toLowerCase().contains("growl");
    }

    private void notifyViaDefaultSystemTray() {
        SystemTray tray = SystemTray.getSystemTray();
        TrayIcon trayIcon = createTrayIcon();
        try {
            tray.add(trayIcon);
            trayIcon.displayMessage("Tomcat", "Server successfully started.", MessageType.INFO);
            System.out.println("System tray notification sent");
        } catch (AWTException e) {
            e.printStackTrace();
        }
    }

    private TrayIcon createTrayIcon() {
        URL resource = getClass().getClassLoader().getResource("icon.png");
        Image image = Toolkit.getDefaultToolkit().createImage(resource);
        TrayIcon trayIcon = new TrayIcon(image, "Tomcat");
        trayIcon.setImageAutoSize(true);
        trayIcon.setToolTip("Hybris server");
        return trayIcon;
    }

}

Step 3 – Package sources as jar file

mvn clean package

At this moment you will have an artifact “tomcat-notification-1.0-SNAPSHOT.jar”

Step 4 – Register listener in the server.xml

For the based hybris app open config/tomcat/conf/server.xml and add a new listener there:

...
<Listener className="com.wordpress.nikitapavlenko.TomcatListener" context="GenericJavaBeanResource"/>
...

Step 5 – Add our jar to tomcat lib folder

For the hybris based project add this jar to config/customize/platform/tomcat/lib and don’t forget to run customize target before ant all.

Step 6 – Results

When growl is in system’s Path:
growl.png

When growl is not in the system’s Path:

default.png

The source code is available my Github. Thanks for reading!

Creating configurable Hybris converters using annotations

The most of developers are aware about converter pattern. The main goal of converter is to convert a source object of type S to a target of type T. We usually need it to convert a model object to the DTO. Despite the fact that idea is very simple there are even many frameworks which help you to do that e.g. Dozer or Mapstruct. Hybris also has it own way to convert data. Basically it provides Converter and Populator interfaces. Converter is used to instantiate an instance of target type and then converter delegates work to a populator which is used to fill the target instance.

interface Converter<S,T> {
   T convert(S source);
}
interface Populator<S,T> {
   void populate(S source, T target);
}

The idea of hybris way is to have a single implementation of converter and reuse it all over the codebase. This implementation should accept target type and populators as parameters and any developer should only write code for populator and create converters only using spring configuration. Sometimes it might be annoying…

Once when I finished writing a populator and I thougt “Why should I declare 10 more lines in spring.xml just to create converter? Why not to do this declaratively?”. At that point I decided to make my own declarative implementation.

My idea was following:

  1. create @Converter annotation
  2. implement BeanDefinitionRegistryPostProcessor to dynamically add converter bean definitions in the context
  3. all added bean definitions for converters are instantiated by spring automatically.
  4. profit

Step 1 – Create @Converter annotation

We need to have a Runtime available annotation with value field for converter name

@Retention(RetentionPolicy.RUNTIME)
public @interface Converter {
 String value();
}

Step 2 – Implement BeanDefinitionRegistryPostProcessor

Here the most interesting part goes. Things we need to do in this class are:

  1. Scan all bean definitions that implement Populator interface
  2. Filter only those classes that have @Converter annotation
  3. Group filtered bean definitions by converter name
  4. Create a converter for a group of populators using converter name as bean id, type of target parameter in the populator as a target class, and grouped populator as populators for converter.

Lets have an example:

@Component
@Converter("productConverter")
public class BasicProductPopulator implements Populator<Product, ProductData> {

    public void populate(Product product, ProductData productData) {
        productData.setName(product.getName());
        productData.setDescription(product.getDescription());
    }

}
@Component
@Converter("productConverter")
public class MoneyProductPopulator implements Populator<Product, ProductData> {

    public void populate(Product product, ProductData productData) {
        productData.setPrice(formatPrice(product.getPrice()));
        productData.setTax(formatTax(product.getTax()));
    }

    private String formatPrice(Price price) {
        return price.getValue() + price.getCurrencySymbol();
    }

    private String formatTax(Tax tax) {
        return tax.getVatRate() + " " + tax.getCode();
    }
}

So we have 2 populators MoneyProductPopulator and BasicProductPopulator. Both of them implement Populator<Product, ProductData>. After our custom BeanDefinitionRegistryPostProcessor scanned and filtered all beans definitions it would group MoneyProductPopulator and BasicProductPopulator into list, it will take
ProductData as a target class for converter and create a bean definition for them in spring context. So that you could inject the converter in your code.

@Resource
Converter<Product, ProductData> productConverter;

It is the source code of ConverterResolverBeanDefinitionRegistryPostProcessor:

package example;

import example.Populator;
import org.springframework.beans.BeansException;
import org.springframework.beans.MutablePropertyValues;
import org.springframework.beans.factory.config.BeanDefinition;
import org.springframework.beans.factory.config.ConfigurableListableBeanFactory;
import org.springframework.beans.factory.support.BeanDefinitionRegistry;
import org.springframework.beans.factory.support.BeanDefinitionRegistryPostProcessor;
import org.springframework.beans.factory.support.GenericBeanDefinition;
import org.springframework.beans.factory.support.ManagedList;
import org.springframework.stereotype.Component;

import java.lang.annotation.Annotation;
import java.lang.reflect.Method;
import java.lang.reflect.Parameter;
import java.util.List;
import java.util.Map;
import java.util.stream.Collectors;
import java.util.stream.Stream;

@Component
public class ConverterResolverBeanDefinitionRegistryPostProcessor implements BeanDefinitionRegistryPostProcessor {

    public static final String CONVERTER_CLASS = "com.copmany.DEFAUL_IMPLEMENTATION_OF_CONVERTER";
    public static final String TARGET_CLASS = "targetClass";
    public static final String POPULATORS = "populators";
    public static final String POPULATE_METHOD = "populate";
    public static final int TARGET_PARAM = 1;

    @Override
    public void postProcessBeanDefinitionRegistry(BeanDefinitionRegistry beanDefinitionRegistry) throws BeansException {
        Map<String, List<BeanDefinition>> converterNameToPopulators =
                Stream.of(beanDefinitionRegistry.getBeanDefinitionNames())
                        .map(beanDefinitionRegistry::getBeanDefinition)
                        .filter(this::doesBeanImplementPopulatorInterface)
                        .filter(this::doesBeanClassHaveConverterAnnotation)
                        .collect(Collectors.groupingBy(this::getConverterName));

        converterNameToPopulators.forEach((converterName, populators) ->
                createAndRegisterConverter(converterName, populators, beanDefinitionRegistry));
    }

    private boolean doesBeanImplementPopulatorInterface(BeanDefinition beanDefinition) {
        Class<?> beanClass = getBeanClass(beanDefinition);
        return Stream.of(beanClass.getInterfaces()).anyMatch(Populator.class::equals);
    }

    private boolean doesBeanClassHaveConverterAnnotation(BeanDefinition beanDefinition) {
        Class<?> beanClass = getBeanClass(beanDefinition);
        return Stream.of(beanClass.getAnnotations()).map(Annotation::annotationType).anyMatch(Converter.class::equals);
    }

    private String getConverterName(BeanDefinition populatorBeanDefinition) {
        Converter converterAnnotation = getBeanClass(populatorBeanDefinition).getAnnotation(Converter.class);
        return converterAnnotation.value();
    }

    private void createAndRegisterConverter(String converterName, List<BeanDefinition> populators, BeanDefinitionRegistry beanDefinitionRegistry) {
        BeanDefinition converter = createConverterBeanDefinition(populators);
        beanDefinitionRegistry.registerBeanDefinition(converterName, converter);
    }

    private BeanDefinition createConverterBeanDefinition(List<BeanDefinition> populators) {
        GenericBeanDefinition converterBeanDefinition = new GenericBeanDefinition();
        converterBeanDefinition.setBeanClassName(CONVERTER_CLASS);
        converterBeanDefinition.setPropertyValues(createBeanProperties(populators));
        return converterBeanDefinition;
    }

    private MutablePropertyValues createBeanProperties(List<BeanDefinition> populators) {
        MutablePropertyValues properties = new MutablePropertyValues();
        properties.addPropertyValue(POPULATORS, createPopulatorsList(populators));
        properties.addPropertyValue(TARGET_CLASS, getPopulatorTargetClass(populators.get(0)));
        return properties;
    }

    private ManagedList<BeanDefinition> createPopulatorsList(List<BeanDefinition> populators) {
        ManagedList<BeanDefinition> populatorReferences = new ManagedList<>();
        populatorReferences.setElementTypeName(Populator.class.getName());
        populatorReferences.addAll(populators);
        return populatorReferences;
    }

    private Class<?> getPopulatorTargetClass(BeanDefinition populatorBeanDefinition) {
        Method[] declaredMethods = getBeanClass(populatorBeanDefinition).getDeclaredMethods();
        return Stream.of(declaredMethods)
                .filter(method -> POPULATE_METHOD.equals(method.getName()))
                .findFirst()
                .map(Method::getParameters)
                .map(parameters -> parameters[TARGET_PARAM])
                .map(Parameter::getType)
                .get();
    }

    private Class<?> getBeanClass(BeanDefinition beanDefinition) {
        String className = beanDefinition.getBeanClassName();
        return toClass(className);
    }

    private  Class<?> toClass(String className) {
        try {
            return Class.forName(className);
        } catch (ClassNotFoundException e) {
            e.printStackTrace();
            return null;
        }
    }

    @Override
    public void postProcessBeanFactory(ConfigurableListableBeanFactory beanFactory) throws BeansException {
        // no operation
    }

}

So basically that is all for the article. Thanks for reading.